
How to Save Money on Food: The Current State of Affairs
It’s no secret that food prices have gotten out of hand in the last several months, maybe even longer. Top that with rising gas and diesel prices, and you find yourself making tough decisions.
We have been saving money on food for years. It’s really just our way of life. We are currently feeding 5 people daily 3 meals a day. Our youngest at the time of this original post is 9 months, and her diet is still 75% breastmilk along with eating whatever we are eating. Our 2 year old eats mostly what we eat, and our 12 year old eats the same things we do.
If you find yourself feeding a family of 10 or a family of 2, you still are probably trying to figure out how to save money on food. These are my top 5 tips to reduce your grocery bill.

How to Save Money on Food:
1. Buy Food in Bulk
We buy rice, flour, cane sugar, potato flakes, beans, oats, and other long term storage foods like these in 25 or 50 pound bags. A great place to buy products like this if you live where we do in Lancaster County, PA is Amish stores. If not, Azure Standard can also be a great option. Some of these things are also affordable at places like the Restaurant Store or your chain bulk stores like Sam’s Club.
If you are going to buy food in bulk, you should think ahead about how you’re going to store that food. Check out my blog on storing food in 5 gallon buckets here. We store food in tubs, barrels, and 5 gallon buckets. Mason jars and mylar bags are popular, too, whether it’s freeze dried or dehydrated food, or canned goods from our pressure or water bath canner.
Buying food in bulk might seem intimidating. If you are buying a bunch of processed food in single serve packages, you probably aren’t saving much money. Maybe a tiny bit of time, but definitely not money.
If your family is on the go, school or work or wherever you all head in a day, consider getting a reusable snack bag or beeswax wrap from our son Bud!
As you’ll read in our 5 gallon bucket post, we keep all of those bulk purchases in buckets or barrels. There is just an infinite amount of things you can make from staple products, like flour, cane sugar, oats, beans, etc. You can make muffins ahead to freeze, breads freeze well, and you can make overnight oatmeal from the rolled oats.
If you can change your mindset about making food ahead and having “ready made” (meaning made by you) foods, you can really reduce your food bill. Ready made foods have gotten a reputation for being processed – made by factories – but ready made food can be MADE BY YOU.

How to Save Money on Food:
2. Shop FlashFood (or other discount grocers)
Here in Lancaster, we really are blessed with a lot of discount grocery stores. We have some large ones and some hole in the wall ones and some that fall in the middle. I grew up going to stores like this. Not because we didn’t have money to buy food at full price, but WHY would you do that when there is perfectly good food that can be bought much more inexpensively that’s the same quality?
My mom always shopped stores like this, and I probably learned a lot of my thriftiness from her. We aren’t cheap. We spend money on things that require good money to be spent on them, like our vehicles, equipment, etc.
So consider seeking out your discount stores and use FlashFood. You can get produce, meat, packaged items, and more by using these resources.
Sign up for FlashFood with my code, and save $5 on your first order: ZADO2SMV9.
How to Save Money on Food:
3. Learn to Preserve Food
This one is a rabbit hole. You can preserve food in so many ways. Freeze drying, fermenting, dehydrating, water bath canning, pressure canning, hang drying, salt curing, smoking, and the list goes on.
Our primary ways to preserve food are currently all of the above except salt curing and smoking. We would LOVE to do more of those two in the near future!
1. Freeze Drying
This method is somewhat magic. You literally load food on trays, freeze it, and put it in the machine to freeze dry. When it’s done, you wind up with food that is good for up to 25 YEARS. What?! If you’re interested in buying a freeze dryer, check out our affiliate link here: https://affiliates.harvestright.com/1479.html.
We are always happy to talk about freeze drying, so shoot us an email at chapelhillforge@gmail.com, if you have questions.
Your freeze dried food will come out of the freeze dryer almost like foam. We love snacking on things like bananas, strawberries, and mangoes. We don’t rehydrate those foods at all. We just eat them straight out of the jar or Mylar bag. Don’t be too offput by the foam consistency. We’ve only had a few things we didn’t LOVE from the freeze dryer. Celery and peppers are ones we just don’t LOVE, but we can powder them to make celery salt or other spices!
You can even freeze dry whole meals, like chili, or you can do up some meat sauce. For things like applesauce, you can freeze dry – and then literally just add water to rehydrate.
This book from our Amazon affiliate link can be really helpful in knowing how and how much for rehydration. When you order your freeze dryer, it will come with a starter set of Mylar bags and oxygen absorbers. Once your food is properly freeze dried, you’ll add it to a Mylar bag, throw in an oxygen absorber, seal the bag with the impact sealer (comes with the freeze dryer), and you can throw it in your long term storage totes.
We love freeze drying because it helps us build up our long term storage, and it’s literally one of the easiest methods. Prep food, load trays, wait, fill bags. You can also store freeze dried food in mason jars. If it’s something we just enjoy snacking on like strawberries, we won’t vacuum seal the jar. If we want to sit it on the shelf for a while, we will. We use our vacuum sealer with the mason jar attachment for this.
This is a nice starter vacuum sealer, and it comes with some bags to get you going. We buy bags in bulk at our local restaurant supply store. You’ll need something like this for sealing mason jars.
2. Fermenting
3. Dehydrating
We have this dehydrator from Cosori (we do make a small commission off this link, if you make a purchase). This dehydrator has done well for us for a few years now. We used to have the old school round one, and we upgraded to this Cosori version with a door and racks. It’s pretty awesome.
For dehydrating, you simply prep the food, add to trays – and wait. We love to dehydrate herbs that we’ll eat. I don’t like to hang dry them because it’s pretty impossible to control dust in our loft style house with 5 people in and out all day taking care of animals, tending to the garden, blacksmithing – and who knows what else.
We also love to dehydrate most fruits and veggies. I did not have my freeze dryer last year, so I relied pretty heavily on the dehydrator. Probably our favorite thing to do in the dehydrator is jerky. Jerky is so versatile. You really can’t mess up the marinade, and you really can’t mess up the meat.
We usually marinade our meats overnight, and then we’ll lay it on the trays to go into the dehydrator. Depending on the type of meat (bison, chicken, beef, venison, etc), and the thickness will determine how long it needs to dehydrate. I usually Google a basic recipe and then check on it periodically. You don’t NEED recipes for jerky, but if you’re a recipe follower kind of person, we do keep this book on hand for inspiration.
When we dehydrate herbs, I use these trays. They are perfect for keeping small pieces from falling through. There is some controversy over whether you should crush your herbs to put them in jars to store them or if you should leave them in long full pieces. I personally don’t have the kind of space that allows for jars with all that air space, so I crush my herbs and store them in jars. (The controversy is that you release the oils in the herbs prematurely). You could vacuum seal the jars, or add an oxygen or moisture absorber, but I personally just screw the lid on, sit it on the pantry shelf and move along. We’ve never had an issue.
I guess I figure IF I got mold or something, I could just compost it.
4. Water Bath Canning
Let me tell you – those 4 are STAPLES in this house. We love all of them, and they get incorporated into many meals.
If you want to start learning how to water bath can, I definitely recommend having this book on hand. This was the first canning book I ever owned – that my mom got me, and I still have my original. Of course, I’ve added to my collection over the years.
Water bath canning is pretty simple. The most important piece of advice I can offer here is MAKE SURE everything is the same temp – hot (clean) jars, hot water, hot food. I’ve broken my fair share of jars over the years because I wait too long to drop in a jar, or the jar wasn’t quite hot enough – or whatever.
If you don’t have all hot everything, you will risk having a thermal break. A thermal break usually occurs along the bottom of your jar, and basically the whole bottom falls out. If you’ve water bath canned, you KNOW the defeat of hearing that crack when you drop in a jar and then all that food you worked so hard to prepare just comes schlopping out into your canner.
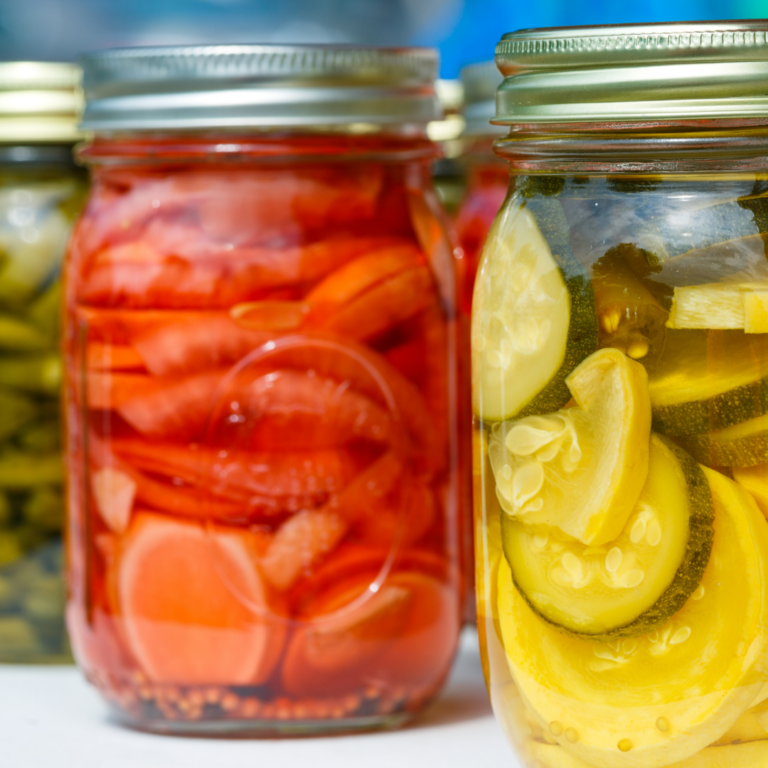
Besides the foods I mentioned already, my favorite things to water bath can are pickles, relishes, salsas, grape juice, apple juice, lemonade concentrate, jams of all sorts, butters (like pear and apple), and pickled beets.
It’s recommended to eat these foods within 18 months, according to Ball, but we have certainly had food on the shelf much longer. It’s so important to follow proper canning rules when you’re prepping food for the shelf. Botulism cannot be seen, and you can’t smell it.
Obviously, if you open a jar, and there’s mold, a seal was bad, the smell is off, or anything else that skeeves, you should compost that, and move on. If we have food that’s sat on the shelf for 5+ years, we will usually feed it to the chickens. Just not worth the risk. *We are NOT trained food professionals. You should obviously and absolutely do your own research and decide what is best for your family and your comfort level.
Water bath canning “season” for us is usually July-October. We are packing the shelves with all our favorites, and it’s SO rewarding in the winter when we can just go to the shelf for our staples.
If you dig into this preserving method, you’ll soon know the joy of hearing a “pop,” which means another jar has successfully sealed.
Also – we do not store our jars with the rings on. We did for years, and after doing some more research, we learned that this just isn’t necessary, and it can keep a false seal on. So once our jars sit for 24 hours out of the canner, we remove the ring, wipe the jars down, label them, and store them. A dark, cool place is a great storage spot for your jars. If you feel like you’re tight on space, try a shelf in the basement, under your bed, a closet – all kinds of places can be great for storing canned goods.
5. Pressure Canning
I’m here to tell you, I’ve now pressure canned many times, and I have yet to destroy any property.
So first of all – we have this book, and it’s fantastic. It’s simple, to the point, easy to understand, and it has tons of recipes. It’s definitely my go to book when I’m pressure canning.
We have an All American 930 Pressure Canner, which we are sharing between us and my parents. It’s an investment, I won’t lie, like the freeze dryer, but man – when you have it, you’ll use it, you’ll love it, and it will SERVE YOU. Read the book. Watch their video. It sounds scary, but I promise after a few times, you’ll have it down.
Our pressure canner holds 14 quarts. In contrast to water bath canning, pressure canning takes time. You can water bath 100 quarts of applesauce in a. day, and it would take a few days to do 100 quarts of something in the pressure canner (in my experience). You’ll want to pressure can on a rainy day, a snowy day – some day that you won’t be standing at the window dreaming of going outside.
We have a propane stove, so it took me a few batches to really know where to set my stove. Our stove gets HOT, and it gets hot fast. I usually keep my burner at about few ticks past low. I know that’s super scientific.
If you make your burner too hot, you can risk syphoning. This isn’t catastrophic, and you can still safely store your canned goods as long as the lid is sealed, but it’s annoying. It makes more mess to wipe off the jars, it makes your canner water full of more mess, and of course you don’t want to waste any of that goodness because of syphoning.
On my short list of things to can in the pressure canner is chili and other complete meals.
Something I love about canning things like chicken or bison is that it makes its own broth! You literally are getting 2 food products from one jar. When you drain off your chicken, save the broth – and use it for soups or other meals.
Again, read the books. Use common sense. Watch some YouTube videos. Be aware of your elevation for the pressure that’s needed.
6. Hang Drying
So we currently have basil, jewelweed, mint, comfrey, and others hanging around the house. Honestly, I just love the look of it, but it’s the easiest preservation method of all.
Just gather your herbs, tie a string around them, and hang them up. Somewhere with great ventilation is best. We have ours hanging in the living room from screws/nails, and Zad made me an awesome flower/herb dryer with some old grill grates. Benefits of being married to a blacksmith/metal fabricator.

How to Save Money on Food:
4. Stop Eating Out. Start Making it Yourself.
We choose our eating out very selectively, especially since the heart attack. I think we’ve eaten out twice since the heart attack – mostly because it’s so much easier for us to control what we’re eating.
Making your own meals from bulk (or even not bulk) ingredients saves so much money. We make literally almost everything from scratch. With the exception of granola bars with high protein and a few other snacks that we keep on hand for on the go. And honestly, we could make our own.
If you aren’t much for cooking, try to get inspired. There are seriously a thousand ways to learn to cook. You can watch YouTube (we love the Bon Appetit channel), you can watch TikToks, YouTube shorts, or find a good old cookbook.
There are so many things you can make yourself and save money, like yogurt, granola, and bread. Bud has a great video on how to make bread here.
How to Save Money on Food:
5. Learn to Love Leftovers
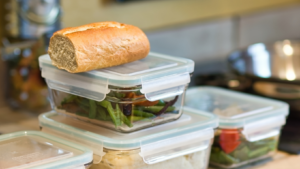
Sometimes we cook with the INTENTION of having leftovers. We’ll make a few extra chicken breasts in the Instant Pot, add a few extra cups of rice to the rice cooker, do a huge roast in the sous vide, or a host of other things. This allows us to have one part of a meal already done.
Extra rice? Make fried rice!
Extra meat? Throw it in eggs the next morning for a protein boost!
Extra noodles? Do a red sauce for dinner and a white sauce the next night!
How to Save Money on Food: Get uncomfortable!
So what’s the best way to save money on food? In my opinion, it’s to get creative. Push yourself. Think outside of the box. Don’t follow societal norms, which say eat out all the time, go to the store multiple times a week, drive out for every little thing, and just don’t be inconvenienced.
We often combine trips. We have things shipped in from Sam’s Club, we hit our favorite bulk Amish stores while we are already out at the chiropractor, we grow a big garden, we raise animals, and we just don’t waste.
I am all about diversifying your inventory. Don’t put all of your eggs in one basket. If you freeze dry every single thing and get mice – you have nothing. If you can every single thing and a shelf falls – you lose it all. If you freeze everything, and the power is out for weeks, you lose it.
Continue the conversation about saving money on food on YOUR homestead on our Facebook page or on Instagram!